To access your WordPress dashboard, start by navigating to your website’s login page. Typically, you can find this by adding /wp-admin or /wp-login.php to the end of your website’s URL (for example, www.yoursite.com/wp-admin).
Once on the login page:
Enter Your Credentials: Fill in your username or email address and password.
Click the Log In Button: After entering your information, click the Log In button to access the dashboard.
Step 2: Navigate to the Users Section
Step 3: Add a New User
You’ll find an option to add a new user within the Users section. Click on “Add New” to proceed with creating a new user account
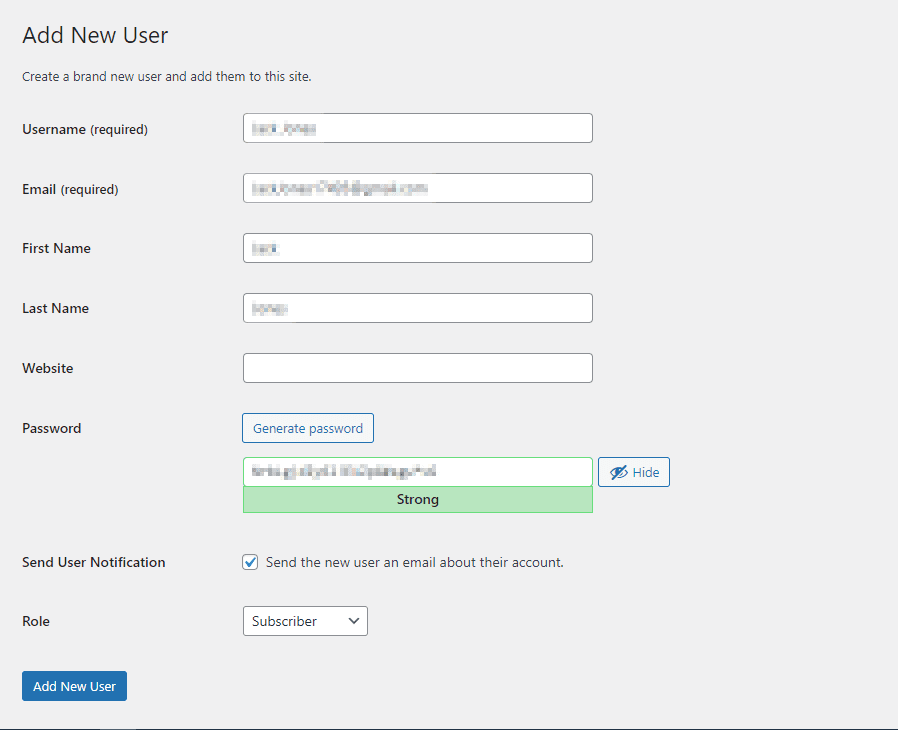
Step 4: Fill in User Details
Username: Enter a unique username for the new user. This cannot be changed later. Email: Provide a valid email address for the user. First and Last Name (optional): Add the user’s full name if desired. Website (optional): Include a website link if relevant. Password: WordPress will generate a secure password, but you can also create your own. Make sure it’s strong to ensure security. Send the New User an Email: Check this box if you want to notify the new user of their account details.
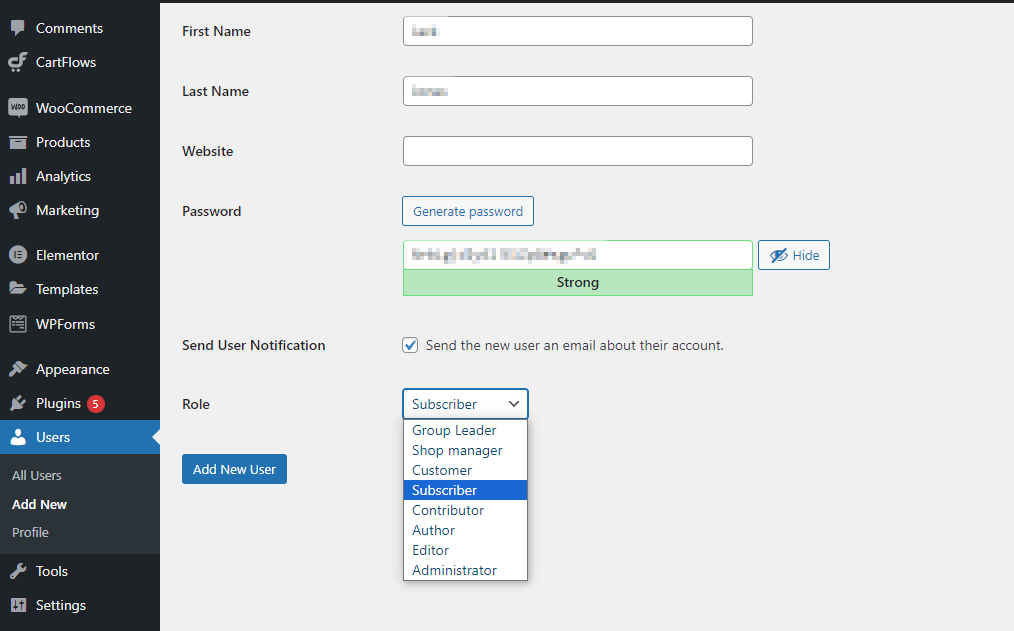
Step 5: Set User Role and Access Level
Choose a role for the new user from the dropdown (e.g., Subscriber, Contributor, Author, Editor, or Administrator). Each role has different levels of access and capabilities within your site.
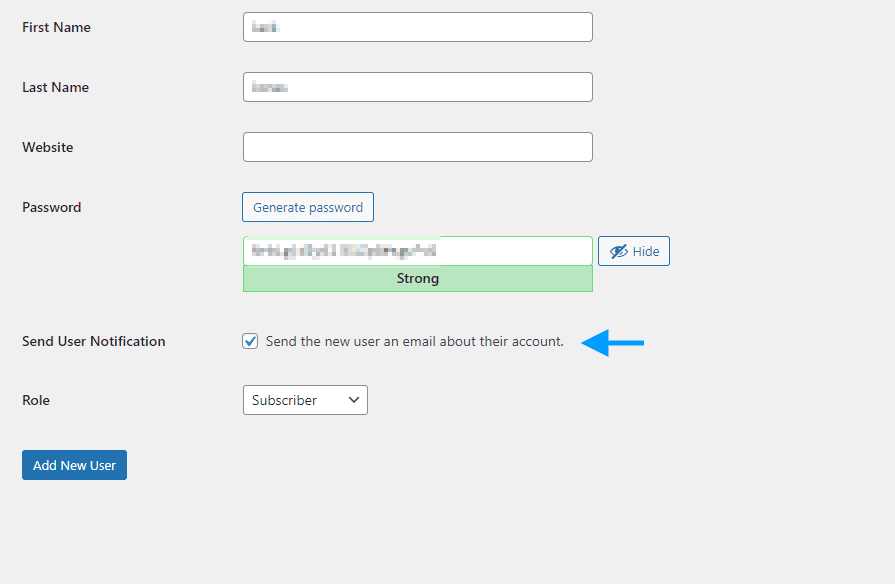
Step 6: Send User Invitation
After filling in the user details and setting the appropriate access level, click on the “Add New User” button. WordPress will then send an email invitation to the new user, containing instructions on how to log in and set their own password. This ensures that the user has complete control over their login credentials.